Pinhole Projection
 As noted in How to View a Solar Eclipse Safely, a convenient method for safe viewing of the partially eclipsed Sun is pinhole projection. With the Sun behind you, pass sunlight through a small opening (for example, a hole punched in an index card) and project a solar image onto a nearby surface (for example, another card, a wall, or the ground). A pasta colander makes a terrific pinhole projector, as does a straw hat or anything else with a bunch of small holes in it. Do NOT look at the Sun through the pinhole(s)!
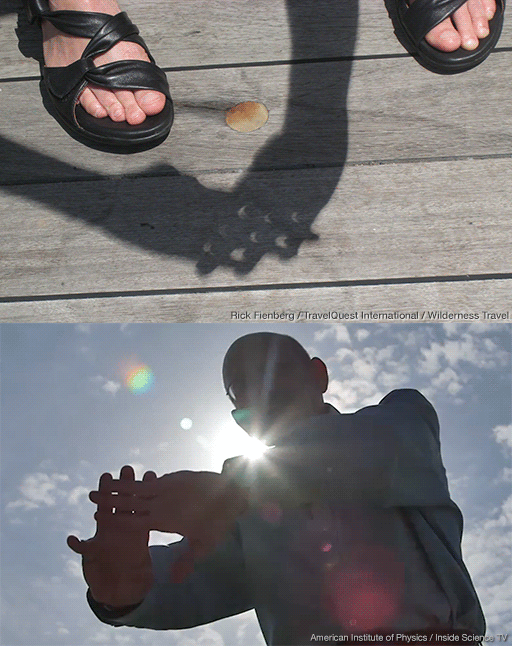
You don't need any special equipment to do this! Just cross the outstretched, slightly open fingers of one hand over the outstretched, slightly open fingers of the other. (You may find this easiest to do with your palms facing up.) Then, with your back to the Sun, look at your hands’ shadow on the ground. The little spaces between your fingers will project a grid of small images on the ground. During the partial phases of a solar eclipse, these images will reveal the Sun's crescent shape, as shown in the accompanying photo. During the annular phase of an annular solar eclipse, the projected images will be little rings.
If your observing site has leafy trees, look at the shadows of leaves on the ground. During a partial solar eclipse, the tiny spaces between the leaves will act as pinhole projectors, dappling the ground with images of the crescent Sun (or images of the ring-shaped Sun during the annular phase of an annular eclipse)!

Note that pinhole projection does NOT mean looking at the Sun through a pinhole! With the Sun at your back, you project sunlight through the hole(s) onto a surface and look at the solar image(s) on the surface. Note too that pinhole projection is not useful for observing the total phase of a total solar eclipse; the projected image would be too faint to see. During totality, when it suddenly gets very dark, it is perfectly safe to look directly at the eclipsed Sun.
Optical Projection
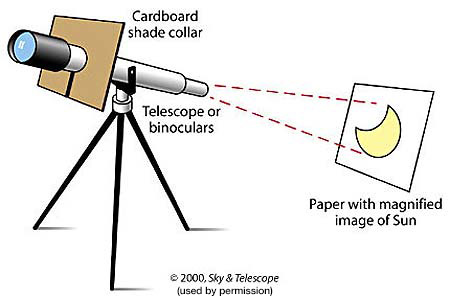
 You can also use a telescope or binoculars to project images of the partially eclipsed Sun onto a surface for convenient viewing. This is called optical projection, because it involves optics (that is, lenses and/or mirrors). Compared with pinhole projection, optical projection generally provides bigger, brighter, sharper images. But because passing bright sunlight through binoculars or a telescope can damage the device, and because of the danger that someone might look at the Sun through the device and injure their eyes, you should not attempt optical projection unless you are an experienced astronomical observer, are using your own equipment, and can remain with your equipment at all times to supervise its use. For two other approaches to optical projection, see "The Sun Funnel" and "The Sunspotter & Solarscope" below.
More information about safe solar viewing, including instructions for pinhole and optical projection:
- "Astronomer Builds Kid-Friendly Eclipse Viewer for Under $20" (College of Charleston)
- "Eye Safety During a Solar Eclipse" (NASA)
- "How to Look at the Sun Safely" (Sky & Telescope)
- "How to Make a Pinhole Camera" (NASA Jet Propulsion Laboratory)
- "How to Safely View a Solar Eclipse" (Exploratorium)
- "How to Watch a Partial Solar Eclipse Safely" (Sky & Telescope)
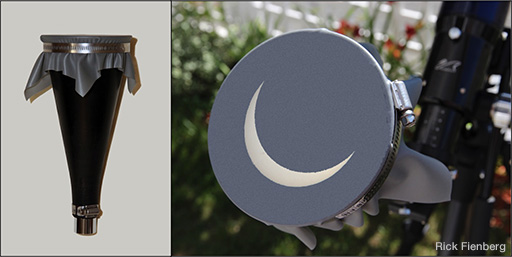
The Sun Funnel
Experienced telescope users know that there are at least two ways to observe the Sun safely. One is to use a special-purpose aperture filter — that is, a filter that fits over the instrument’s aperture, or front opening — to block all but a minuscule fraction of the Sun’s light and thereby create a comfortably bright image in the telescope’s eyepiece. Most such solar filters are made from metal-coated glass, metalized polyester film, or a sheet of black-polymer material.
Sometimes, though, it can be hard to convince non-astronomers to look through a filtered telescope; despite your most sincere reassurances, they’re afraid they’ll hurt their eyes. In any case, only one person at a time can view the Sun in the telescope’s eyepiece.
 One way around these problems is to project an image of the Sun from your telescope onto a card or screen. Now nobody has to look through the telescope (which means no refocusing and no bumping), and many people can view the solar image at the same time. But, as noted above, there’s a risk that someone might accidentally look into the bright beam of sunlight emerging from the eyepiece.
The solution to that problem, and an even safer way to use a telescope to observe the Sun, is rear-screen projection.
"Build a Sun Funnel for Group Viewing of Solar Eclipses & Other Fascinating Solar Phenomena" is a step-by-step illustrated guide to constructing a simple, inexpensive rear-screen-projection device that enables multiple people to observe an optically projected image of the Sun simultaneously and safely. The document, available as a PDF on our Downloads page, is intended for knowledgeable amateur and professional astronomers who know how to operate a telescope for solar observing.
The Sunspotter & Solarscope
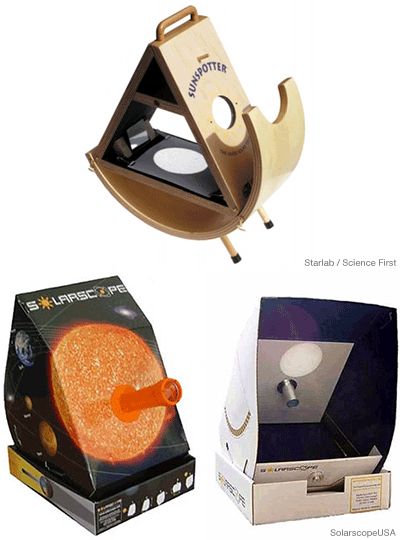
 Originally developed at Learning Technologies, the company that invented the Starlab inflatable planetarium, the Sunspotter is billed as "the safer solar telescope." Like the Sun Funnel, the Sunspotter uses optical projection to produce a magnified image of the Sun that can be viewed by many people at once without risk of anyone looking into a bright beam of sunlight. It's price, around $500, may be more than many individuals would care to spend, but the Sunspotter wasn't really designed for individuals; it was designed for astronomy clubs, schools, museums, and planetariums.
A similar but less expensive alternative is the Solarscope, which comes in several versions (some made of wood, like the Sunspotter, and some made of cardboard) priced around $200.
If your school or organization is planning to hold an eclipse-watching event for students or the public, a Sunspotter or Solarscope is worth considering.
- Sunspotter (Astronomical Society of the Pacific)
- Solarscope (Solarscope USA)
A less expensive device of similar design is available in kit form: the Solar Projector made by AstroMedia in Germany. It costs only $30 or so, but it requires assembly by someone who's handy with tape, glue, and sharp knives and prepared to follow the 34-step instructions (available as a 6-page PDF).

